
From the Web Client, you can share information with conference participants.
Requirements to initiate Sharing from the Web Client
Component |
Requirement |
Operating System |
|
Web Browser |
|
Virtual Environments |
|
The MiShareApp application must be installed in your machine before you can initiate sharing for the first time.
The MiShareApp application is installed and upgraded automatically when you install latest MiCollab Client (MiCollab for PC Client or MiCollab for MAC Client).
NOTE: After succesfull installation, the MiShareApp application closes automatically.
NOTE: Safari and Internet Explorer 9 platforms do not support automatic download of MiShareApp.
If you are using legacy Desktop Client or do not have MiCollab Client installed, you must download the MiShare application provided on the MiCollab Audio, Web and Video Conferencing server using MiCollab End-user Portal (MiCollab End-user Portal > Audio, Web and Video Conferencing > Settings > MiShareApp) or from your browser (click the Share icon on the MiCollab Audio, Web and Video Conferencing web page of the browser), and install it manually.
NOTE: The MiShareApp application is upgraded automatically when you click Share icon in the conference window.
To initiate web sharing on non-Chrome browsers:
Click the Join Meeting link provided in the Leader's invitation e-mail. You can also copy the Join Meeting link in the e-mail or copy it directly from the MiCollab Audio, Web and Video Conferencing web page.
Enter the link in the address bar of your browser.
NOTE: Make sure that pop-ups are allowed in your browser settings.
The Web Client Join page opens.
To join as a Participant, enter your name and click Join.
To join as a Leader, click Join as Leader and enter your credentials.
Click Share in the Web
Client.
If the MiShareApp application is not installed, it is downloaded when
you click Share.

Install MiShareApp manually after the download is complete.
After MiShareApp is installed, click Share to initiate sharing.
The screen selection popup appears, indicating
that Your Entire Screen is selected for sharing.
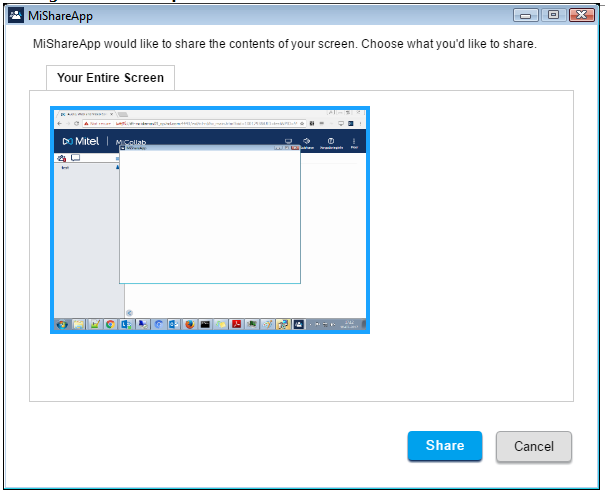
NOTE: Non-Chrome browsers do not support sharing of specific applications. The entire screen will be shared with the participants.
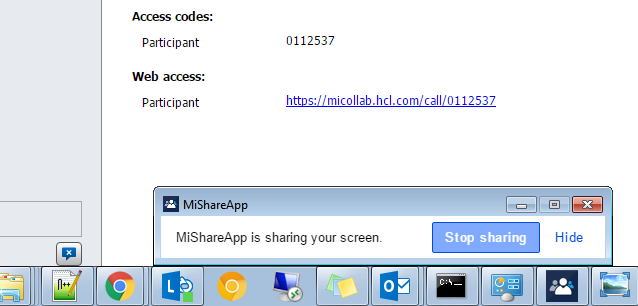
Click Share to initiate sharing. The left panel of the application displays Your Name(WebShare). A dialog box appears at the bottom of the screen indicating that sharing is in progress.
In the dialog box, you can:
Click Stop Sharing to stop the sharing process.
Click Hide
to minimize or X to close
the dialog box.
To initiate sharing for the first time, you must install the MiCollab Audio, Web and Video Conferencing Web sharing application and the extension on your Chrome browser. The application and the extension are available from the Chrome Web Store. You must manually install the application and the extension. You need to install these only once.
To install the MiShareApp application and the extension:
Click the Join Meeting link provided in the Leader's invitation e-mail. You can also copy the Join Meeting link in the e-mail or copy it directly from the MiCollab Audio, Web and Video Conferencing web page.
Enter the link in the address bar of your Chrome browser.
NOTE: Make sure that pop-ups are allowed in your browser settings.
The Web Client main page opens.
To join as a Participant, enter your name and click Join.
To join as the Leader, click Join as Leader and enter your credentials.
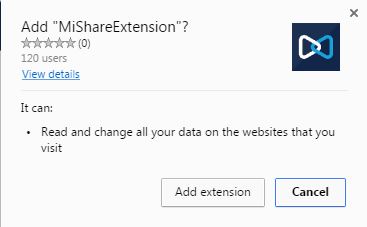
Hover your mouse over the Share icon and click the Install Extension option. MiShareExtension displays in a new tab.

NOTE: Make sure that pop-ups are allowed in your browser settings.
Click Add to Chrome.
Click Add extension. The extension is added to the Chrome browser.
After the extension is added, click the Close Window icon to return to the Main Conference page.
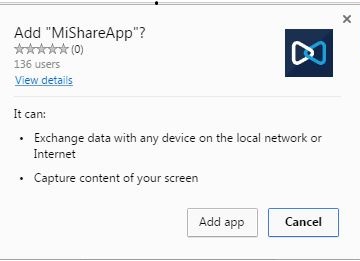
Hover your mouse again over the Share icon and click the Install App option. MiShareApp is displayed in a new tab.

Click Add to Chrome.
Click Add app. The application is added to the Chrome browser.
Click the Close Window icon to return to the Main Conference page.
Click Share to initiate sharing. The screen selection popup appears indicating that Your Entire Screen is selected for sharing. Click Application Window to share your Desktop or any Application with the other participants in the conference. The left panel of the application displays Your Name(WebShare). A dialog box appears at the bottom of the screen indicating that sharing is in progress.
In the dialog box, you can:
Click Stop Sharing to stop the sharing process.
Click Hide to minimize the dialog box.
To display the dialogue box again:
On Windows platforms, two Chrome icons appear in the application tray. Hover your mouse over the Chrome icon in the tray and click the MiShareApp dialog box.
On MAC platforms, a single Chrome icon appears in the dock. Right-click the icon and select the MiShareApp dialog box.
To stop sharing, click Stop sharing in the MiShareApp dialog box.
When you share from Web Client, the viewer region is hidden and Sharing In Progress is displayed in the meeting details title.
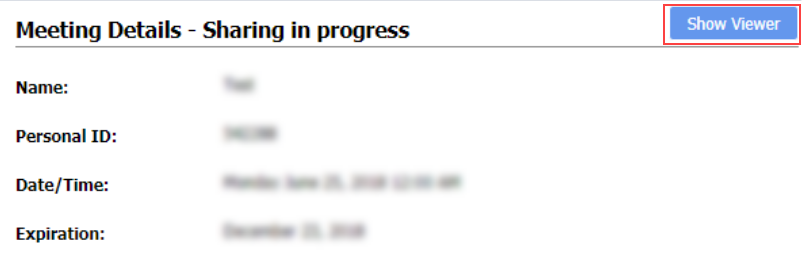
Click
Show Viewer to display the viewer
(to view the shared screen). Click ![]() to hide the viewer.
to hide the viewer.
To stop the sharing, click Stop Sharing from the MiShareApp dialog box.
NOTE: This will be applicable for both Chrome (using Chrome plugins for sharing) and non-Chrome browsers (using native MiShareApp for sharing).
Your PC must meet the MiCollab Audio, Web and Video Conferencing computer requirements.
On Windows, sometimes multiple entire screens may appear as screen selection options.
While recording is being broadcasted from Windows Desktop Client, if you try to share from the Web Client, then the sharing app launches, Your Name(WebShare) is added as a participant, and the stop sharing dialog box displays; however, sharing is not initiated. Instead, only the broadcasted recording is displayed in the viewer.
You cannot share a Region. Only Application and Desktop sharing is supported.
You cannot share applications that are in minimized mode.
On Windows platform, in general, while sharing an application, the menu items are not shared if the application is not in full screen mode. Menu options are shared in Full screen mode.
On Windows 8/8.1 platforms, the Start menu is visible only after the application is shared.
On Windows 7 platforms, if you move the application to the background, the preview section might slightly shift to the right, causing a thin black strip to appear on the left.
On MAC platforms, the size of the Preview window reduces when a shared application is minimized.
Sharing an MS office 2016 application works only when application is in full-screen and in the foreground. If the application is re-sized or moved to background, the preview section displays incorrect content.
On Windows platforms, some applications in the Sharing selection dialog box may display in black (fore example, HipChat, Sticky Notes, and Visual Studio Code), which indicates that sharing is not supported for these applications. To enable sharing of these applications, share Your Entire Screen and bring the applications to the foreground.
Sharing is not supported for the Windows Sticky Notes application.
Edge browser is not shown in the applications list.
When sharing a PowerPoint application (Application window sharing is used instead of Entire Screen sharing), when you start the PowerPoint slide show, the slides are not shared; instead, the PowerPoint screen is shared.
When the presenter is sharing an Application window on Chrome browser and they minimize the application that is being shared, the sharing is paused for other participants (the last-shared screen freezes). The presenter must restart the sharing to resume the paused sharing.
When downloading the MiShareApp file:
Safari opens a new tab, but it does not close after the download.
All other browsers will download the app on the same tab.
On Edge version 25, MiShareApp does not launch when you click Share. This behavior does not occur on the other versions of Edge.
When the application is launched for the first time from Share, a confirmation popup is displayed on the browser for the user to confirm that the app be opened. There is an option to retain the confirmation choice so that the confirmation screen does not display subsequently. . However, on Edge, the confirmation popup always appears, and the confirmation step cannot be skipped.
On Firefox browser, after manually uninstalling the MiShareApp, you must refresh the Firefox browser to reset the browser preferences. To refresh the Firefox browser:
On Firefox browser, click the Menu button (at the upper-right corner) and then click Help.
From the Help menu, choose Troubleshooting Information.
Click the Refresh Firefox button at the upper-right corner of the Troubleshooting Information page.
To continue, click Refresh Firefox in the confirmation window.
Screen lock behavior while sharing:
On MAC, if the machine is turned to sleep mode while sharing, sharing is paused and a black screen is displayed. However, sharing resumes when the screen becomes active because of a mouse or keyboard movement.
On Windows 10, if the screen is locked while sharing Entire screen, sharing is not paused and the lock screen is shared. On Windows 7 and 8, sharing is paused.